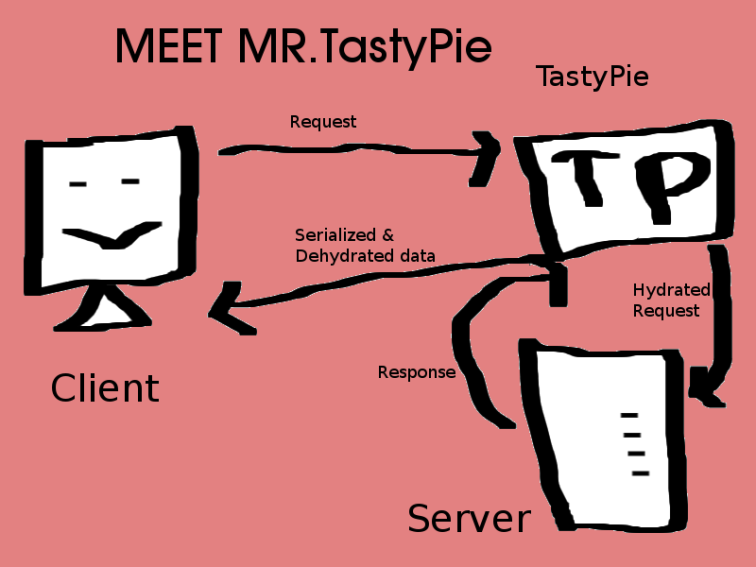
Namaste everyone. It is been very long since I wrote an article. This time I came up with an essential thing for creating API in Django web framework. We all know that REST API are needed these days for building communication channels between different systems and devices.
What is Django Tastypie?
Django Tastypie is a framework that allows us to create RESTful API in our Django web applications. Simply putting, it is a web service API framework. There is one more such library called Django REST Framework. Without a library we can only implement a basic API with no security or no customized API results. Tastypie provides tons of features to build API with a very good control. In the upcoming journey we starts with basics and see advanced stuff next.
We will build an API for a Restaurant. You can access the sample working code here https://github.com/narenaryan/tastypie-tutorial
Basics of Tastypie
Since we are following a practical hands-on approach, let us create a sample Django project from scratch. I hope that you are in a virtual environment. Virtual environments are good for isolating different projects. If you are not familiar with them, just give a look at http://docs.python-guide.org/en/latest/dev/virtualenvs/
In this article we are going to create an API for a fake restaurant which allows developers to build apps for their products. I use Django 1.8 for my illustration.
$ pip install django-tastypie
$ django-admin startproject urban_tastes
$ cd urban_tastes
$ django-admin startapp services
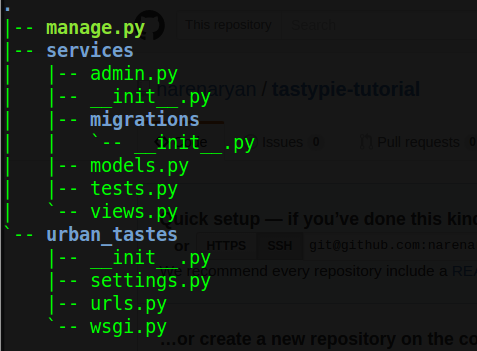
We just installed Tastypie library and created a project called urban_tastes. Then we created an app called services which takes care of the API for the restaurant. Now project structure looks like this.
There are certain steps in using Tastypie. They are.
- Include “tastypie” in INSTALLED_APPS
- Create api.py file in app
- Create Resources for Django models
- Provide Authorization
Let us create a Django model for holding product, order information of restaurant.
# services/models.py

from django.db import models
import uuid

class Product(models.Model):
    name = models.CharField(max_length=30)
    product_type = models.CharField(max_length=50)
    price = models.IntegerField(max_length=20)

    def __str__(self):
        return self.name

class Order(models.Model):
    id = models.UUIDField(primary_key=True, default=uuid.uuid4, editable=False)
    product = models.ForeignKey(Product)

    def __str__(self):
        return self.id
Let us add few products using admin panel. But in order to access custom models Product, Order in Django admin panel we need to register them in the admin.py file. So go and edit admin file as follows.
# services/admin.py

from django.contrib import admin
from services.models import Product, Order

admin.site.register(Product)
admin.site.register(Order)
Now we need to add both our app “services” and “tastypie” in the INSTALLED_APPS list.
# urban_tastes/settings.py
...
INSTALLED_APPS = (
    'django.contrib.admin',
    'django.contrib.auth',
    'django.contrib.contenttypes',
    'django.contrib.sessions',
    'django.contrib.messages',
    'django.contrib.staticfiles',
    'tastypie',
    'services'
)
...
Now apply migration for new models.
$ python manage.py makemigrations
$ python manage.py migrate
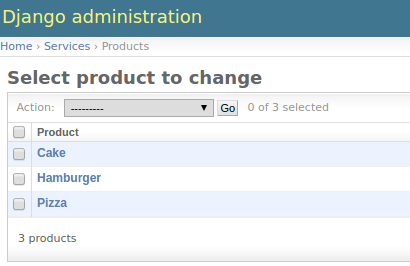
Now I added three products called Pizza, Hamburger and Cake through admin panel.
$ python manage.py createsuperuser
$ python manage.py runserver 0.0.0.0:8000 # Visit http://localhost:8000/admin
We are going to authenticate our upcoming REST API using an API key. Tastypie has a builtin API Key generator with it. We can use it by adding a signal for User object to tell whenever a new user is created, just generate an API Key. Tastypie already has a signal defined. We just need to use it. So create apps.py in services and define custom app configuration.
# services/apps.py

from django.apps import AppConfig
from django.contrib.auth.models import User
from django.db.models import signals
from tastypie.models import create_api_key


class ServiceConfig(AppConfig):
    name = "services"

   def ready(self):
       # This line dispatches signal to Tastypie to create APIKey
       signals.post_save.connect(create_api_key, sender=User)
Now add the defined ServiceConfig app configuration as default in the __init__.py file.
# services/__init__.py
default_app_config = 'services.apps.ServiceConfig'
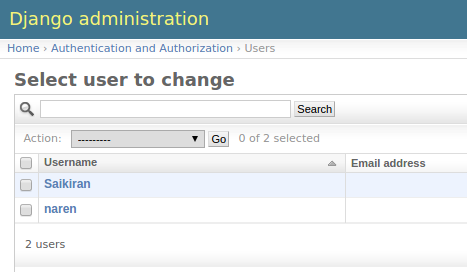
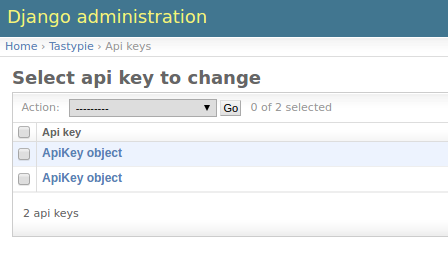
Basic step is done. If we create a new user, Tastypie automatically generates an API Key. I created a super user and also added another user. For both users, API keys are generated.
Resources in Tastypie
Resources are the heart of Tastypie. By defining a resource we can actually convert a model into an API stream. The data is automatically converted into API response. The resources of Tastypie gives us good flexibility in checking the validity of requested data and also modifying a response before sending to client.
Let us create resources for both Product and Order so that API is available.
# services/api.py

from tastypie.resources import ModelResource
from services.models import Product, Order


class ProductResource(ModelResource):
    class Meta:
        queryset = Product.objects.all()
        resource_name = 'product'
        allowed_methods = ['get']


class OrderResource(ModelResource):
    class Meta:
        queryset = Order.objects.all()
        resource_name = 'order'
        allowed_methods = ['get', 'post', 'put']
Let us understand the process of creating a resource.
- Import ModelResource from tastypie
- Import models from services app
- Create custom resource by inheriting ModelResource and link app model in inner Meta class of resource. We created two resources for building API for two models product, order. The allowed_methods setting defines what methods API supports.We make our product API implement GET method. But an order can be created, modified so it supports GET, POST, PUT.
Add API URL in the urls.py of app. Here create urls.py under the services app.
# services/urls.py

from django.conf.urls import url, include
from tastypie.api import Api
from services.api import ProductResource, OrderResource

v1_api = Api(api_name='v1')
v1_api.register(ProductResource())
v1_api.register(OrderResource())

urlpatterns = [url(r'^api/', include(v1_api.urls))]
Now include these URL in project’s URL dispatcher file.
# urban_tastes/urls.py

from django.conf.urls import include, url
from django.contrib import admin

urlpatterns = [
 url(r'^admin/', include(admin.site.urls)),
 url(r'', include("services.urls")),
]
That’s it. We have setup the Tastypie with Django and ready to access API. Now run the server. If it is already running just visit this URL in browser or make a python request using requests.
http://localhost:8000/api/v1/product/?format=json
You will see something like this
{
     "meta":{
     "limit":20,
     "next":null,
     "offset":0,
     "previous":null,
     "total_count":3
     },
     "objects":
   [
     {
     "id":1,
     "name":"Pizza",
     "price":2,
     "product_type":"food",
     "resource_uri":"/api/v1/product/1/"
     },
     {
     "id":2,
     "name":"Hamburger",
     "price":3,
     "product_type":"food",
     "resource_uri":"/api/v1/product/2/"
     },
     {
     "id":3,
     "name":"Cake",
     "price":2,
     "product_type":"snack",
     "resource_uri":"/api/v1/product/3/"
     }
  ]
}
Now try to access Orders with the same API structure.
http://localhost:8000/api/v1/order/?format=json
It return with zero objects.
{"meta": {"limit": 20, "next": null, "offset": 0, "previous": null, "total_count": 0}, "objects": []}
Above Tastypie product API returns data for all the fields. In order to make only few fields accessible to developer, we use a setting called excludes
# services/api.py

...
class ProductResource(ModelResource):
    class Meta:
        queryset = Product.objects.all()
        resource_name = 'product'
        excludes = ["product_type", "price"]
        allowed_methods = ['get']
...
Now the JSON response coming from API will not contain data for product_type and price.
{
     "meta":{
     "limit":20,
     "next":null,
     "offset":0,
     "previous":null,
     "total_count":3
     },
     "objects":
  [
     {
     "id":1,
     "name":"Pizza",
     "resource_uri":"/api/v1/product/1/"
     },
     {
     "id":2,
     "name":"Hamburger",
     "resource_uri":"/api/v1/product/2/"
     },
     {
     "id":3,
     "name":"Cake",
     "resource_uri":"/api/v1/product/3/"
     }
  ]
}
Here we don’t have any authentication. Let us add basic authentication where username and password needs to be provided to access the Tastypie REST API.
# services/api.py
from tastypie.authentication import BasicAuthentication

class ProductResource(ModelResource):
    class Meta:
        ...
        authentication = BasicAuthentication()
>>> import requests
>>> from requests.auth import HTTPBasicAuth
>>> print requests.get('http://localhost:8000/api/v1/product/')
<Response [401]>
>>> print requests.get('http://localhost:8000/api/v1/product/', auth=('naren', 'passme'))
<Response [200]>
Implementing custom API key authentication in Tastypie
Tastypie generally provides a bootstrapped version of API key authentication. Let us remove BasicAuthentication and add ApiKeyAuthentication in api.py
# services/api.py

from tastypie.authentication import ApiKeyAuthentication
...
class ProductResource(ModelResource):
    class Meta:
        queryset = Product.objects.all()
        resource_name = 'product'
        excludes = ["product_type", "price"]
        allowed_methods = ['get']
        authentication = ApiKeyAuthentication()
...
API key for a user can be obtained from admin panel for now. API Key for user naren is 4fa7b65b6fcb951b6185000c699a22450b1cd060 . Now you need to pass Api key in the Authorization header in the following format.
Authorization => "ApiKey naren:4fa7b65b6fcb951b6185000c699a22450b1cd060"
In Python requests, terminology of the above request looks like this.
>>> requests.get('http://localhost:8000/api/v1/product/', headers={"Authorization": "ApiKey naren:4fa7b65b6fcb951b6185000c699a22450b1cd060"})
<Response [200]>
This kind of authentication is not useful because of the username. We need an API which actually takes sole API key as the Authorization parameter. We just generate an API key and will give it to developer. It should look like is this.
Authorization => "4fa7b65b6fcb951b6185000c699a22450b1cd060"
For this Tastypie allows us to implement our own authentication system. We just need to Inherit the Authentication class from Tastypie. create a file called authentication.py and define custom Authentication there.
# services/authentication.py

from tastypie.models import ApiKey
from tastypie.http import HttpUnauthorized
from tastypie.authentication import Authentication
from django.core.exceptions import ObjectDoesNotExist

class CustomApiKeyAuthentication(Authentication):
    def _unauthorized(self):
        return HttpUnauthorized()

    def is_authenticated(self, request, **kwargs):
        if not(request.META.get('HTTP_AUTHORIZATION')):
            return self._unauthorized()

        api_key = request.META['HTTP_AUTHORIZATION']
        key_auth_check = self.get_key(api_key,request)
        return key_auth_check

    def get_key(self, api_key, request):
        """
        Finding Api Key from UserProperties Model
        """
        try:
            user = ApiKey.objects.get(key=api_key)
        except ObjectDoesNotExist:
            return self._unauthorized()
        return True
Explaining above code:
- We Inherited Authentication class and overridden is_authenticated method.
- is_authenticated method should return a Boolean value. Here we are checking whether the api key that passed exists or not. If not exist we are not authorizing the request.
After replacing ApiKeyAuthentication with our CustomApiKeyAuthentication complete api.py file looks like below.
# services/api.py

from tastypie.resources import ModelResource
from services.models import Product, Order
from services.authentication import CustomApiKeyAuthentication


class ProductResource(ModelResource):
    class Meta:
        queryset = Product.objects.all()
        resource_name = 'product'
        excludes = ["product_type", "price"]
        allowed_methods = ['get']
        authentication = CustomApiKeyAuthentication()


class OrderResource(ModelResource):
    class Meta:
        queryset = Order.objects.all()
        resource_name = 'order'
        allowed_methods = ['get', 'post', 'put']
        authentication = CustomApiKeyAuthentication()
>>> requests.get('http://localhost:8000/api/v1/product/', headers={"Authorization": "4fa7b65b6fcb951b6185000c699a22450b1cd060"})
<Response [200]>
Dehydrating the JSON data
Dehydration in Tastypie means making alterations before sending data to the client. Suppose we need to send capitalized product names instead of small letters. We normally iterate over objects and capitalize letters in the JSON response in the client side. But Tastypie provides useful methods for altering ready to send data on the fly. Now we see two kinds of dehydrate methods.
Dehydrate_field method
This dehydrate_field is used to modify field on the response JSON. See below code how it works.
# services/api.py

...
class ProductResource(ModelResource):
    class Meta:
        queryset = Product.objects.all()
        resource_name = 'product'
        excludes = ["product_type", "price"]
        allowed_methods = ['get']
        authentication = CustomApiKeyAuthentication()

    # This method look for field "name" and apply upper on it
    def dehydrate_name(self, bundle):
        return bundle.data['name'].upper()
...
Now resulting JSON looks ilke this
{
     "meta": {
       "limit": 20,
       "next": null,
       "offset": 0,
       "previous": null,
       "total_count": 3
    },
      "objects":
 [
     {
      "id": 1,
      "name": "PIZZA",
      "resource_uri": "/api/v1/product/1/"
     },
    {
     "id": 2,
     "name": "HAMBURGER",
     "resource_uri": "/api/v1/product/2/"
    },
    {
     "id": 3,
     "name": "CAKE",
     "resource_uri": "/api/v1/product/3/"
    }
  ]
}
Observe carefully. We got PIZZA, HAMBURGER, CAKE instead of small letters. Similarly we can use dehydrate method to modify the bundle data. Bundle is the serialized data that Tastypie kept in ready to send to client.
Dehydrate method
# services/api.py

import time

...
class ProductResource(ModelResource):
    class Meta:
        queryset = Product.objects.all()
        resource_name = 'product'
        excludes = ["product_type", "price"]
        allowed_methods = ['get']
        authentication = CustomApiKeyAuthentication()

    # This method look for field "name" and apply upper on it
    def dehydrate_name(self, bundle):
        return bundle.data['name'].upper()

    # Using dehydrate we can add more fields or modify like above
    def dehydrate(self, bundle):
        bundle.data["server_time"] = time.ctime()
        return bundle
...
{
     "meta": {
       "limit": 20,
       "next": null,
       "offset": 0,
       "previous": null,
       "total_count": 3
    },
      "objects":
 [
     {
      "id": 1,
      "name": "PIZZA",
      "resource_uri": "/api/v1/product/1/",
      "server_time": "Sat Apr 30 14:06:14 2016"
     },
    {
     "id": 2,
     "name": "HAMBURGER",
     "resource_uri": "/api/v1/product/2/",
     "server_time": "Sat Apr 30 14:06:14 2016"
    },
    {
     "id": 3,
     "name": "CAKE",
     "resource_uri": "/api/v1/product/3/"
     "server_time": "Sat Apr 30 14:06:14 2016"
    }
  ]
}


